This Article will explain how to install DNSFilter with a PowerShell Script using NinjaONE.
This will be a headless installation so the end user will not see anything on their display.
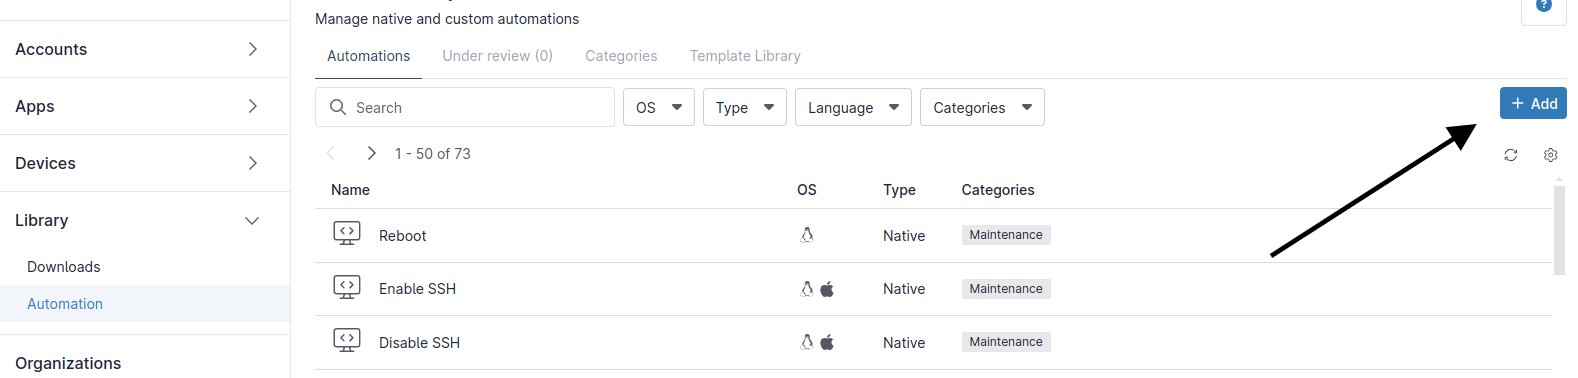
1. Select Administration --> Library --> Automation --> Add (upper right corner) --> New Script
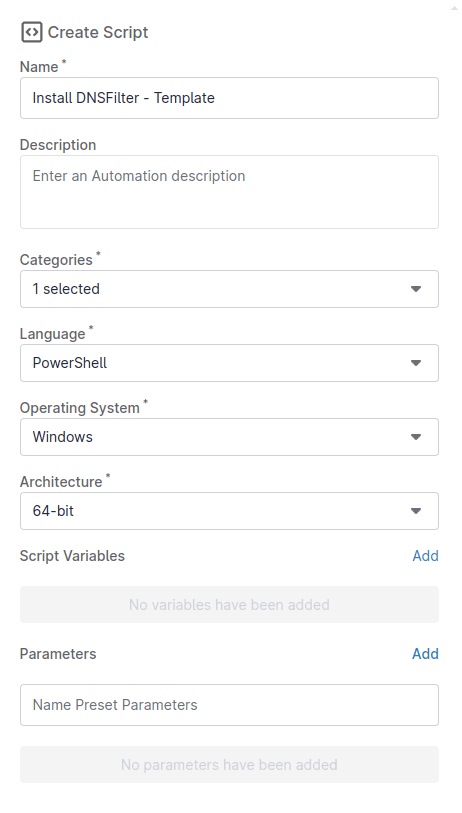
2. When the New Script Window Opens, Set the Following Variables:
NAME: DNS Filter - Template
DESCRIPTION: Enter your Description
CATEGORIES: Select your Category
LANGUAGE: Select "POWERSHELL"
OPERATING SYSTEM: Select "Windows"
ARCHITECTURE: Select "64-bit"
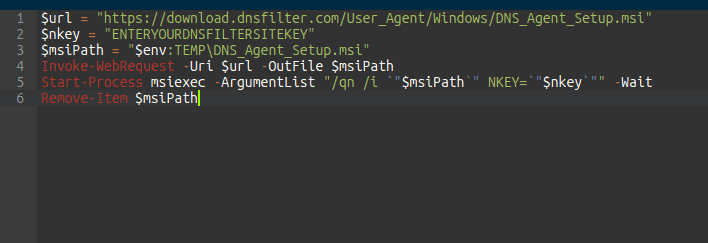
3. In the Script Area Paste the Following code and Click Save: (MAKE SURE TO REPLACE $nkey with your KEY)
4. Now the Script is now ready to run on a End Point.
Select The Device --> Select the "Play" button --> Select "Run Automation" --> Select "Script" --> Select the new script you added.
Wait a minute or so and then check your DNSFilter Dashboard for the new agent